Summary
Get a handle on your external media, including jump drives, external hard drives, and memory cards, which are essential tools for storing files, photos, and videos, using this step-by-step guide and kit from Archival Methods.
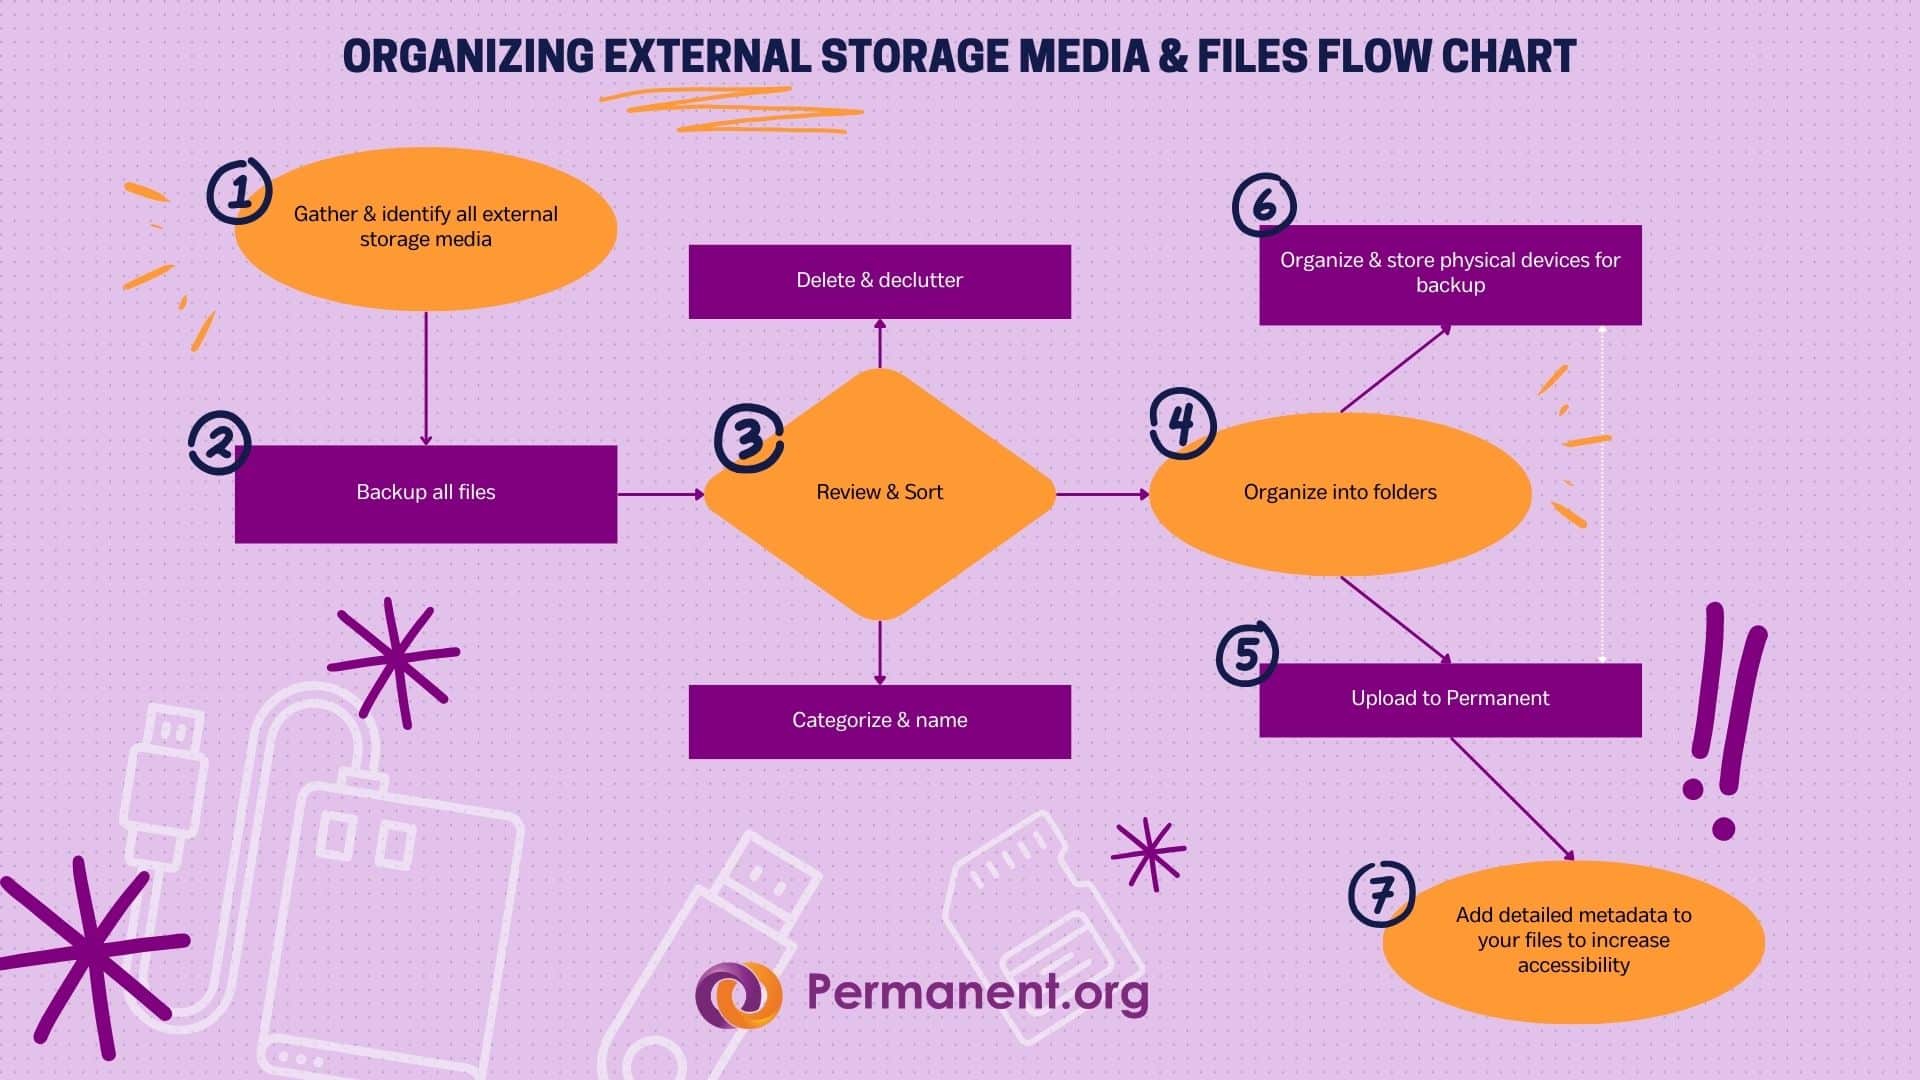
A Step-by-Step Guide for Preserving Files from Jump Drives, External Hard Drives, and Memory Cards.
External media, including jump drives, external hard drives, and memory cards, are essential tools for storing files, photos, and videos. As we amass these devices over time, they can add to clutter and become disorganized. If you’ve been using these devices for years, chances are they hold a mix of cherished memories, work or school documents, and miscellaneous files. Personally, I have jump drives from roughly twenty years ago to present, documenting everything from my undergraduate projects and papers to the art, design, and DIY publishing work I currently do in my free time.
Preparing to upload your digital content to a secure space like Permanent.org is a great opportunity to declutter and organize your drives and memory cards. Here’s how to do it efficiently—and how Archival Methods’ USB & Memory Card Storage Kit from Archival Methods can help you along the way.
Step 1: Gather & Identify All of Your External Storage Media
Start by collecting all of your jump drives, external hard drives, and memory cards. If they aren’t already labeled, use stickers or write directly on them to note their contents (e.g., “Travel Photos 2015,” “School Projects,” “Miscellaneous Files”). This step helps you identify each device’s purpose at a glance and avoid confusion.
Step 2: Backup All Files
Before diving into file organization, it’s a good idea to switch your devices to “read-only” mode to ensure nothing is accidentally changed or deleted while you transfer files. Some devices allow you to do this via a switch on the device itself. Then, you’ll begin copying everything from your devices to your computer or a single external hard drive to create a backup file. Create folders on your computer to mirror the contents of your devices for easy sorting. This ensures nothing is lost during the process and provides peace of mind as you work on the next steps.
Step 3: Review, Sort, and Declutter
Go through the files on each drive and categorize them into groups, such as:
- Photos and Videos: Family events, vacations, special occasions
- Documents: Work-related files, school projects, personal records
- Music and Media: Audio files, playlists, downloaded videos
- Miscellaneous: Anything that doesn’t fit into the above categories
Delete duplicates and unnecessary files to pare down your collection. As you sort, rename files using consistent naming conventions, such as “Vacation_2023” for photos or “Archives_640_Paper_2012” for documents. This makes it easier to locate files later. As an example, the files I’ve chosen to share publicly (link below) were given names that follow a Title.# format since I have multiple images of the same artwork but want to keep them together for viewing purposes. This naming convention allows me to add more images of the same artwork should I dig up more as I build my archive.
Step 4: Organize Files into Folders
Create a logical folder structure for your files based on their categories. For example:
- Photos → By year or event
- Documents → By project or type (e.g., Professional, Personal)
- Videos → By topic or creator
This structure will streamline your upload process to Permanent.org and ensure your digital archive remains organized long-term.
Step 5: Prepare for Uploading
Once your files are organized, transfer them to your computer if they’re still stored on an external device. Create or log in to your Permanent.org account and begin uploading, replicating the folder structure you created on your computer. You may use Permanent’s SFTP feature to make this process go even faster, if you are working with large collections.
Step 6: Safely Store or Repurpose USB Drives
After uploading, you can decide how to handle your devices. If you want to keep them for backup or future use, store them in a safe, organized manner. For physical organization, I used the USB & Memory Card Storage Kit from Archival Methods. This durable kit provides a sleek, efficient way to store your USB drives and memory cards in one place. With individual compartments and a protective case, it keeps your devices safe from dust, damage, and misplacement—especially helpful if you have several devices. Please note that this kit might not fit larger external hard drives, but is perfect for the smaller ones that are on the market currently.
If you no longer need the drives, wipe them clean or remove the files and recycle them responsibly.
Why Permanent.org Is the Perfect Home for Your Digital Files
By uploading your files to Permanent.org, you’re ensuring they’re stored securely and are easily accessible for generations to come. Unlike physical storage devices, Permanent.org provides a long-term solution and peace of mind. Be sure to use tags, metadata, and descriptions to make your files even easier to find or use in your Permanent archive. Upon completing this project, I was able to unearth some of my art and artists’ books that I created while in grad school. This collection from 2008-2009 is part of my Permanent public archive that is meant to document my art practice, which now includes some of the work that really solidified my love of artist books as a medium.
Using tools like the USB & Memory Card Storage Kit to organize physical devices and following these steps for digital decluttering will make your migration to Permanent.org efficient and rewarding. Take this opportunity to simplify your digital life and enjoy the benefits of a clutter-free, permanent.org archive!